Sunday, 18 October 2015

Life Drawing with skeletons with charcoal

I drew multiple poses of a skeleton dressed in some clothing (a work coat and hat) with chalk to practice my skills on drawing the figure, but of course this time without having much shape to it like a normal body would, though the clothing helped take a slight shape as if it did have some property to it.
Each drawing had a different technique to it, one having been using quick and messy strokes of charcoal, one focusing on the negative space, some attempts of drawing the whole skeleton in my view, others only part of it etc.
I overall do feel comfortable and a little confident with how to use charcoal and how the drawings turned out, despite being challenged to try these different techniques, some I haven't used before.


Stick Drawings

To practice for life and figure drawing I was told to use a long stick with charcoal and coloured chalk taped to either end of the stick i was using to draw instead of using a pencil or the chalk by hand, it would challenge my skills and help develop them more, encouraging me to take more confident strokes and movements with my hand, arm and body when drawing.

Using the stick was still proving difficult, but I think I was doing better then I was last time,
with this piece of work I did the outline of all the objects first before colouring them in
with coloured crayons/chalks.

With this piece I think I was quite confident in the lines, as shown and
can be seen in the picture, they're not as messy as my other pieces of work
using chalk on a stick, and shows an actual object/figure.

Hazard Poster


My idea for my poster was to link it allergic reactions that can happen when using the materials in the studios. 

I first did some research of what can cause the allergic reactions within a creative workspace, this included latex, some certain rubbers, dust, wood clippings/shavings, mod rock, food brought in etc. Also researching the safety equipment that can help prevent it including certain cloves, make, safety glasses, work coats etc.

Once getting my research down, writing and drawing some ideas in my sketchbook of what I would like my poster to look like I gathered the available equipment from the studios and took pictures of them. At first I did them on a white background but then I realized equipment that were also white or see-through like the gloves and masks which might not come out too clear when I'm developing them later, so I retook some photographs but in front of a darker background, using black paper.
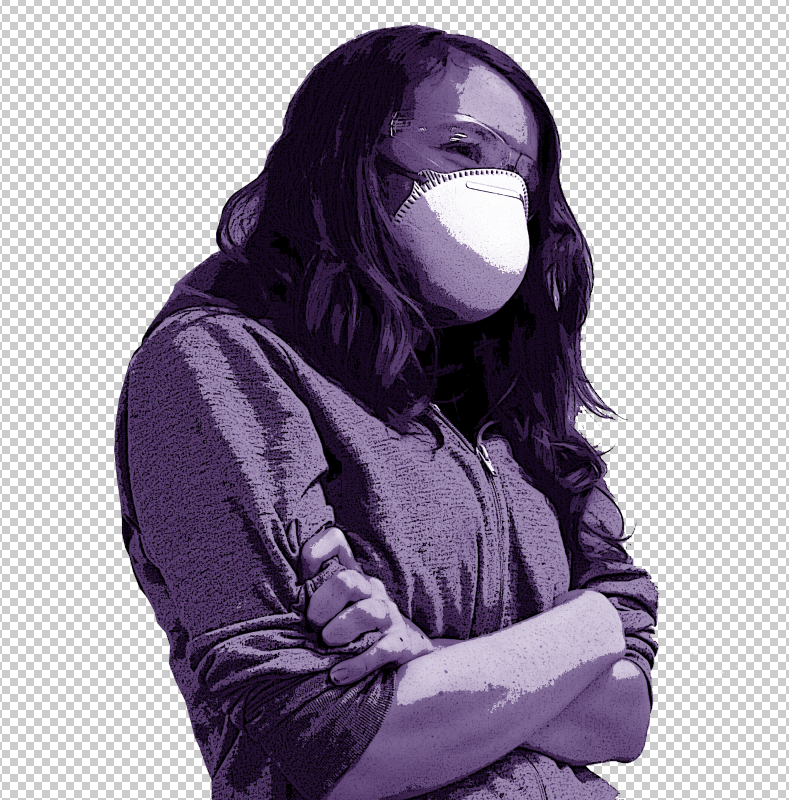
I took pictures of me wearing a mask, safety glasses/goggles and gloves, also some of a skeleton model wearing them that was in the studio.

I used the figure drawing skeleton as a
model to use for the poster, in my mind
I thought the image of  a skeleton on a
health and safetly/warning poster would
be more effective and eye catching,
espically for the subject.
I decided to add myself into the poster
to show what to wear relating to health
and safety when working with equipment
and certain materials.


I then tried using a darker background,
thinking that using a white background when
wearing a white/see-through glove wouldn't
cut out as easy, so just in case I used a dark
background aswell.
I used a latex white/see-through glove to
use for the safety on a white background to
prevent any unwanted colours showing up
in the picture.


I began developing the photographs, cutting them out from their backgrounds, highlighting them, improve their contrast and brightness and all used a poster and paint dab filter on them, making them stand out as I used the effect strongly on them.
Once happy with their effects I began to experiment with different colours on them to use on the poster, mainly the colours red, green and yellow.
Feeling more confident about my developed photographs I put them on a poster template with impact and helvetica font.


Coming to an end in my developing my photographs and design of the poster, I changed the posters background to black and the borderline, font and developed photographs to a bright yellow that helps it pop out and catch peoples attention.


Wednesday, 16 September 2015

Sculpting Clay Art


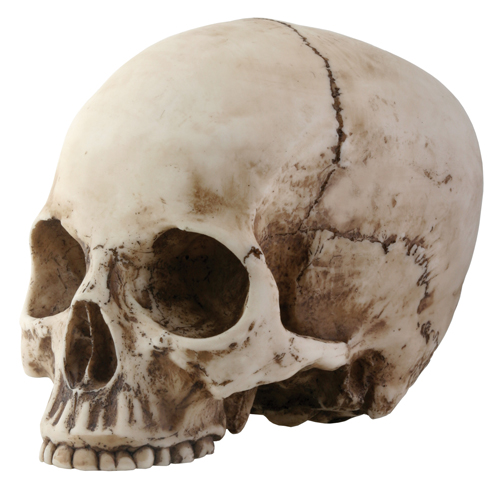
On the subject of figure drawing, I practiced to try and make similar shapes of bones from just looking at a model skeleton.

My first attempt was making the radius and ulna bone that makes up the forearm. I got the basic shape of the ulna first, the larger bone, making the ends thicker and stronger looking then the middle which would thinner and have a small bend to it. Then I moved onto the radius bone, the smaller and thinner bone of the two, comparing the shapes of them so I could get close to an accurate sculpture of them.
I then put wires into both of them so they wouldn't fall apart, the ulna having a much thicker one then the radius.


The second attempt was to make the bottom part of a skeleton jaw, the mandible. I did find it more difficult to sculpt and make into the shape I wanted, but I did help me try different ways of sculpting the clay, smoothing it out, joining separate pieces of clay together but making them look like one piece etc.


My third attempt was at the vertebra which belongs in the spine of a skeleton, it was defiantly more difficult to make then my previous attempt of different bones since it was smaller and had a more complicated shape.


I took a handful of clay and made a ball shape out of it before pushing my thumb into the middle but not all the way through it, then making the hole made by my thumb bigger to make a bowl shape. I made two of these bowls before joining them together, using a bit of water on the rim of them, so they made a bigger ball but with trapped air inside.
I proceeded to then shape the ball into the shape of a skull, adding on extra bits of clay to help make a head shape and the top part of the jaw, the maxilla. I also removed bits of clay and shaped them to make the eye sockets, nasal hole etc.

I tried to get the bottom of the skull and the top jaw
to actually look close to realistic in shape,
though this proved difficult and took up quite a bit
of my time and patience for it, but eventually I was
satisfied with how it turned out.
Getting the main shape of a skull and upper jaw took
some time, especially with the upper jaw since it was another
piece of clay placed on the ball of clay, making the main
head of the skull, and molded into it upper jaw shape.
I tried to make sure it looked semi-accurate all
over, with a good size and good proportions.
I first dug out some clay where the eye sockets were
going to be and then used my thumbs to shape them
a lot more and in my opinion a lot better then if I had
used a piece of equipment.

I pinched the clay together for where the bridge
of the nose was going to be, it looked a bit
strange and wonky the first couple of times I
tried, but eventually I molded it into a shape I
was at least satisfied with.
The finished product of the clay sculpture of the skull
and upper jaw proved, in the end, to be successful in my
opinion, especially when I added the dents or soft spots
on the skull where they are on actual skulls, giving it a
more immersed look.

I smoothed out the clay all over, including underneath the skull, in and around the eye sockets so the brow of them leaned forward a little, making them pop out in a way. I also smoothed out the shaw of where the cheekbones would be o the skull and did some quick lines with a small piece of wire to make the shapes of teeth. 

Overall I am happy yet surprised how my clay model of a skull turned out, it looks a lot smoother and a lot closer to resemble the real shape of a skull than I had expected.
Final Personal Project - Art

Final Project

I researched a range of surreal artists and their artwork to try and think of how I would make my own piece of work surreal, taking ideas and inspiration from some surrealists ideas.
After looking through different types of surrealism, some shown on this post about Surrealism, I felt that I could relate my work to work of Rene Magritte.

My idea for my final project was going to be linked to Rene Magritte's eye painting "The False Mirror". I planned to have it closely linking it to my research with the eye shape, though there wasn't going to be an iris, instead the eye would look like it had a metal paneling with a broken pupil on top of it.
I was planning to complete my final piece in one try, staying close to my planned out idea of how I would make it, but as I was finishing my first attempt of it I felt like it was lacking something. I discussed how I felt my project was lacking something and thought about redoing my art project completely with my tutor, I was encouraged to do more than just sketch and paint but also try to use my work without starting over from scratch.
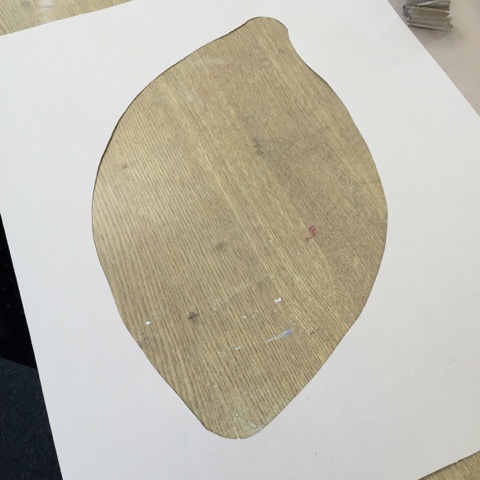
I used what I believe to be a light brown sugar paper as the skin around eye, cutting out the shape of where the eyeball would go in the middle, I would've experimented with colours to make a skin colour from scratch but at this point I wouldn't have much time to get the right one I wanted since I wasn't very confident in making it myself.

I used the grey metal colour I had already done and painted what was to look like metal paneling and some light shadows of them, after finishing that I cut it out and put it under the brown sugar paper, gluing them together so they would stay in place. Then I used a piece of my old work of an eye that had the red veins around the corners of it, cutting out the shape of the broken pupil so I could lay it atop of my newest piece of work and get the exact same shape of the broken pupil I planned to use and keep.
After that I added on some water colour of eyelashes onto the brown sugar paper so it didn't look too plain. Overall I think it came out better then I planned it to be, using cut out pieces of work to build it helped it to pop out more then it would've on a single sheet of paper.


Thursday, 11 June 2015


Portfolio


Chloe Cooper - 
Telephone: / ~ /
Email: chloe_cooper@btinternet.com 
Address: / ~ /

I see myself as someone with a a good amount of confidence, which has improved incredibly since taking a trainee course at a BT centre where they helped expand my knowledge on how to work within an organisation and other skills. 
I have plenty of patience, enabling me to stay focused on work for long periods of time, all suitable for being part of a team or working independently, also if I was offered a position in work but had to travel for it, I would be willing to do so. 
When I have my mind set on a certain role and work I can become motivated, patient, creative, hardworking and adaptable while using multiple skills that I have been taught by others who are experienced or have learnt by myself independently. 
I always try to give my 110% if effort and concentration into my work and take as many opportunities that come across me as much as possible.  

I attended Retford Oaks Academy from 2008 to 2014, getting my main qualifications in science, math and english along with the ones from art, history, geography, R.E, media etc. While I was still at Retford Oaks Academy I attended the BT Centre who had a trainee course available in Doncaster, I started on the 23rd June and completed it on the 30th of July. I took re-sits in English and Math and successfully earned Level 2 in BTEC Work Skills, Level 2 in BTEC Customer Service, Level 2 in NVQ Business Administration, B in English and D in Math along with some work experience. 
Once finishing at Retford Oaks I applied for a position at North Nottinghamshire College on the Art, Design and Media Level 2 course which lasts for about a year. I successfully got accepted by the college and started on the 8th of September, 2014, going in 4 days a week, I'm still currently attending. 
On the 31st of May, 2015, I earned a job position I applied for at Tesco in the Dotcom department, working on Tuesdays, Thursdays and Saturdays in the morning, I'm still currently working.

In my free time I enjoy a range of things which include:
Going online to either listen to music which genres include indie, metal, EDM, techno, house etc. Listening to podcasts, reading articles, horror, drama, adventure stories etc. 
Watching animations and gameplay etc. or television to watch comedy, horror, thriller or classic movies and TV series, documentaries etc. 
Writing down ideas, painting, sketching and making storyboards that I could possibly later develop into improved drawings or an animation.
Playing puzzle, open world, survival, fighting, shooting, fighting and story driven games on consoles.
Going out to meet friends, cinemas, parks, walking trials, woods, even traveling within the UK and around the world, taking tours in different countries etc.


Examples of my work:

I researched clothing brands and designs, evaluation what colours work best together, how big the design is, where a bouts on the clothing it is etc. I then developed ideas to make my own T-shirt design. I improved the way I think of and develop ideas, feeling a lot more confident with my ideas as I improve them.
Once I understood what automatic art was I made my own piece of work using the automatic art technique, letting my ideas change and develop by themselves.
To help make me think of how I want to my own DVD menu to look I researched ideas for the  interactive media DVD menu and explained what the menu included, that being the colours, sound effects, contrast, shadowing, special effects etc.
I wrote an automatic written story, where I would just write down the first things that came into my head, making it into a story of some sort.
Throughout making 3D Art I took pictures as evidence of my work, including before and afters of certain pieces and how I made them etc.
I thought of ideas of a character to use in a 3D art project, thinking of the environment the character would be in, what they would look like, a description of it, research etc. It mostly being paperwork for 3D art, including what resources I used for research and how I'll use it.
When I was working on a cyber bullying project I researched the facts, opinions, stats etc. Gathering information about the subject from others, as well as my own knowledge about bullying and what to do. So I designed an anti-cyber bullying card, it's purpose to encourage those being bullied to speak up and tell somebody.
For my 3D work I wrote my overall opinion of my work, describing how I did, how I could've improved and done better, why I didn't complete it before the deadline, overall how I felt about my work etc.
I took pictures of my 3D art mod rock as evidence. I included pictures when I was practicing with mod rock on bottles, an ice-cream tub, a wire structure of a tree I made, how I took it off them afterwards once the mod rock had dried and the health and safety when using the mod rock and other equipment that's included.
For my evaluation I described what I did, how I did it, what techniques were used, the visual language, health and safety, how well i worked and how I think I could've improved.